Block a malicious email address in cPanel

Log into the cPanel account and scroll down to the “Email Management Tools” box and enable SpamAssassin.

Click on “Configure SpamAssassin” button and set the score to 5 or 6. The greater the number the more SPAM you could receive.

Click on “save”.

You can also configure Mozilla Thunderbird to accept SpamAssasin’s headers to help it identify SPAM. Set it on your account settings on a “per account” basis.

Set filters in “Account Level Filtering”

You can add the filter for a specific email address from “cPanel>> Mail>> User Level Filtering” option to DISCARD the incoming emails from that malicious email address you want to block. Here are the steps to set a filter.

1. login to cPanel and go to “cPanel>> Mail>> User Level Filtering” option.

2. Add the following filter for your domain email accounts.

Rules:

Select “From” from drop down menu, then you’ll need to select “Contains” from the drop down menu.

Actions:

Enter the email address you want to block” and click on Activate button.

This filter will block one particular email address from coming into the email address on your domain email address\es and at the same time, your email address will not send any bounce back email message to the blocked email address.

Installing Magento through Installatron requirements missing error in WHM

Installing Magento through Installatron requirements missing error:

Requirements:
php-intl-version-minimum v1 (detected: OFF) php extension
php-memory-limit 128MB (detected: 32MB)

You will need to install php-intl-version-minimum in EasyApache:

Home >> Software >> EasyApache then click on customize

Then under PHP Extensions you will need to find php-intl-version-minimum and click the tab to install.

Once you have done this you will need to click on the “Review section” then click the “Provision” button at the bottom of the page.

Then for the php-memory-limit t you will need to go to:

Home >> Software >> MultiPHP Manager to see which PHP version is installed.

Now click on “MultiPHP INI Editor” and select that PHP version in the drop down box.

Find “memory_limit” and increased to 128M and then click on “Apply” at the bottom of the page.

Then run the Magento installation through Installatron again.

Roundcube – IMAP Server dropping the connection

When trying to log into your email account via the Roundcube webmail client and IMAP keeps dropping the connection you can fix this by:

  • #tail -20 /var/cpanel/roundcube/log/errors  —>To check the logs
  • #/etc/init.d/courier-imap restart                       —>To restart the IMAP service
  • #/scripts/courierup –force                                  —>To update the IMAP server

If the issue is still not resolved then you may need to change the permissions of the mail directory with the command below but make sure the username is the username from cPanel:

  • #chown -R username:mail /home/username/mail
  • #chown -R username:mail /home/username/etc


WHM/cPanel -Permission denied (publickey,gssapi-keyex,gssapi-with-mic)

When trying to log into a server with WHM/cPanel via SSH and you get this error:

Permission denied (publickey,gssapi-keyex,gssapi-with-mic)

This will be because password authentication is disabled in the sshd_config file

To resolve this you can log into WHM and enable the password authentication.

  • WHM >> Security Center >> SSH Password Authorisation Tweak

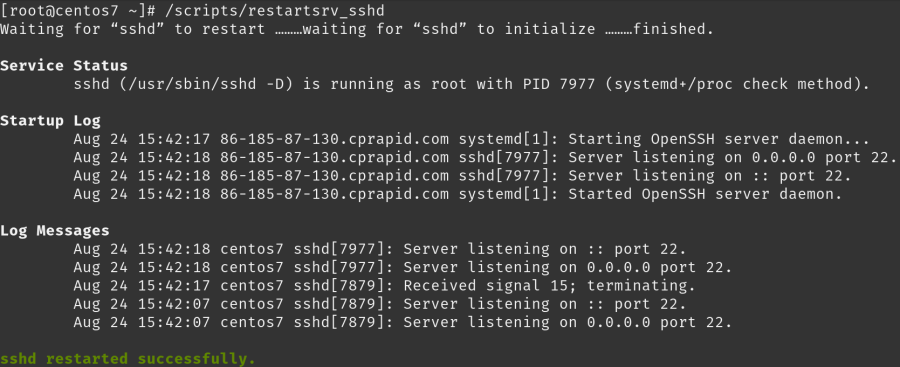
Then restart the SSH service:

cpanelssh

Install (LAMP) stack On CentOS 7

Install Apache

To install Apache run the following:

sudo yum install httpd

Once it installs, you can start Apache on your server using:

sudo systemctl start httpd.service

To test that the web server is working use:

http://your_server_IP_address/

If you see the Apache test page, then your web server is now correctly installed. Now enable Apache to start on boot using the following:

sudo systemctl enable httpd.service

How To Find your Server’s Public IP Address

If you do not know what your server’s public IP address is you can use:

ip addr show eno1 | grep inet | awk ‘{ print $2; }’ | sed ‘s/\/.*$//’ or curl http://icanhazip.com

Install MySQL (MariaDB)

MariaDB is a community-developed fork of the MySQL relational database management system. To install MariaDB use the following:

sudo yum install mariadb-server mariadb

After installation you start MariaDB with the following command:

sudo systemctl start mariadb

Run a simple security script that will remove some dangerous defaults by
running:

sudo mysql_secure_installation

It will ask for current root password so just press enter for none and then
it will prompt you to set a root password.

Then you want MariaDB to start on boot by using the command:

sudo systemctl enable mariadb.service

Install PHP

To install PHP you need to run the following:

sudo yum install php php-mysql

Once that is installed you will need to restart the web server using:

sudo systemctl restart httpd.service

Test PHP Processing on your Web Server

If you’re not running WHM/cPanel or Plesk then run:

sudo vi /var/www/html/info.php

Put this code into the empty file:

<?php phpinfo(); ?>

If youre running a firewall then you may need to run these commands:

sudo firewall-cmd –permanent –zone=public –add-service=http

sudo firewall-cmd –permanent –zone=public –add-service=https

sudo firewall-cmd –reload

To test this go to:

http://your_server_IP_address/info.php

Then if everything is ok then remove the php file using:

sudo rm /var/www/html/info.php

The reason this file is removed is because sometimes it can reveal information about the server we do not want unauthorised people to know.

Done LAMP is now installed on your server.